



Randy Stow didn’t wait for the system to catch up with his mother. When Deloros was diagnosed with multiple sclerosis in 1965, her condition slowly stole her independence. By the time complications made daily life at home nearly impossible, Randy had already built a career. He used his professional expertise to modify her house. It was a move that changed everything for her.
That was 18 years ago. Since then, Randy has helped countless others navigate similar struggles. Whether it’s age, injury, or disease, the goal remains the same: adapt the home to the person, not the other way around.
The Growing Need for Accessible Housing
This isn’t just a personal story. It’s a statistical reality. According to the 2000 U.S. Census, nearly 50 million Americans live with some form of disability. Of those, 6.8 million struggle with basic tasks like bathing, dressing, or moving around their own homes.
The number is only going up. The Older Americans 2008 report, published by the Federal Interagency Forum on Aging Related Statistics, projected that by 2030, roughly 71.5 million people will be 65 or older. And as we age, the risk of disability rises.
So, where is the support? Governments and private organizations have stepped in. But here’s the catch: while there are regulations for certain housing types, there are no federal standards for handicap accessibility in non-federally funded, detached single-family homes. You’re largely on your own.
That’s why looking at existing federal standards and design guidelines is so useful. They provide a blueprint. Even if the law doesn’t force you to follow them, they offer a clear path to creating a home that works for everyone.
Three Philosophies for Usable Spaces
Making a home accessible isn’t about one magic fix. It’s about three different philosophies applied to your specific needs. We’ll look at those ideas next. But first, let’s start outside.
Creating a Handicap-Accessible Yard and Entry
The yard is the first impression. It’s also the first obstacle. You want firm, level surfaces that allow wheelchair traffic but still provide traction for walkers. Edging is key here. It keeps people on the path and plant life off it. Raised beds or hanging plants can make gardening accessible without bending over.
Getting inside should be easy. Federal mandates usually require accessible entrances, so why not build on that standard?
The Entryway: Thresholds and Ramps
The entry doorway is critical. The threshold should be no higher than one-half inch (about 13 mm). Slope it or round it. Anything higher becomes a trip hazard or a barrier for wheels.
If your home has steps, a ramp is often the solution. But not just any ramp. A proper accessible ramp needs to follow specific rules:
- Width: At least 36 inches (915 mm) wide to fit a wheelchair.
- Slope: Use the least possible incline. Steeper ramps are harder to navigate and more dangerous.
- Safety: Install handrails and curbs to prevent slipping or falling off the sides.
- Protection: Ensure the entry is covered. Wind, rain, snow, and ice make any entryway hazardous.
Once you’re inside, the layout changes the game. Universal design principles suggest placing the bedroom, kitchen, entertainment area, and a full bathroom on the main floor. This eliminates the need for stairs when mobility becomes an issue.
Legislation and Certification Programs
You might wonder if these standards are legally binding. The Americans with Disabilities Act (ADA), enacted in 1990, focuses on public spaces, businesses, and public accommodations. It doesn’t typically govern private homes.
The Fair Housing Act, amended in 1988, covers multi-family housing units with four or more stories. It has strict guidelines for access routes and grab bars. But for the average homeowner building or renovating a single-family detached house? There’s no federal mandate.
This makes finding a home that meets your needs challenging. That’s where the EasyLiving Home certification comes in. It’s a private program that verifies accessibility features. To earn the label, a house must include:
- At least one step-free entrance.
- Interior doorways with a clear passage width of 32 inches (813 mm).
Final verification happens through a site visit. It’s a third-party check that ensures the promises made on paper are real in practice.
“Designing for accessibility isn’t just about compliance. It’s about dignity.”
The laws give us a baseline. The certifications give us peace of mind. But the real work happens in the details. How you measure a doorway. How you slope a ramp. How you arrange a kitchen. These choices determine whether a house is just a structure or a true home.
We’ve covered the outside. The entry. The legal landscape. Now we move deeper into the house. How do you adapt the interior spaces? What specific tools and materials do you need to make those changes permanent and safe? That’s the next step.
Clearing the Path: Doors, Hallways, and Stairs
If you can’t move through your home without struggling, the rest of the renovation doesn’t matter. Accessibility starts with getting from point A to point B without hitting a wall or a threshold. For wheelchair users, and even those using walkers or canes, narrow doors are a nightmare. You need a clear opening of at least 32 inches. That’s roughly 813 mm. Anything less and you’re risking a collision.
Thresholds are the silent trip-wires of interior design. They should be rounded and sit no higher than half an inch above the floor. A high threshold isn’t just an annoyance. It’s a barrier.
Hallways need to be wider. Aim for 36 inches (915 mm) minimum. If the hallway forces a sharp turn for a wheelchair, you might need to go even wider. It’s not about aesthetics. It’s about physics.
Then there are stairs. They are a major limitation in most homes. To make them safer, treads—the horizontal part you step on—should be at least 11 inches wide. Round the edges to prevent toes from catching. Handrails are non-negotiable. Install them on both sides. Make sure they extend beyond the top and bottom steps so you have something to hold onto before you even start climbing.
Storage and Flooring Hacks
Walk-in closets often get overlooked in accessibility planning. They need 32-inch wide doorways, just like the rest of your rooms. Inside, rethink how you store clothes. Adjustable rods are good. Pull-down rods on hydraulic hinges are better. You can store heavy items high up and bring them down to a reachable height easily.
Carpeting seems cozy. Plush carpet feels luxurious. But for a wheelchair user, it’s a maze. The resistance makes maneuvering exhausting. The Americans with Disabilities Standards for Accessible Design recommend a pile height of no more than half an inch. Skip the throw rugs entirely. They shift. They bunch. They cause falls.
Electrical placement is another low-cost, high-impact tweak. Outlets should be at least 15 inches above the floor. Light switches and thermostats need to be within reach. Keep them no higher than 48 inches from the floor. You shouldn’t have to stand on a stool to change the temperature.
Finding the Right Pro
Designing a home to accommodate changing needs is complex. You don’t have to figure it all out alone. Look for a Certified Aging-In-Place Specialist. This designation comes from the National Association of Home Builders. These pros bring a mix of assessment skills, technical knowledge, and management expertise. They help you modify your home so you can stay there safely for longer. It’s about independence.
Bathrooms: Safety First
Bathtubs are historically problematic for those with limited mobility. Walk-in tubs exist, but they’re usually too narrow for a wheelchair. A shower is a better bet. Install a seat. Get a hand-held shower head. It adds versatility.
Temperature control is a safety issue, not just a comfort one. Set your water heater to 120 degrees Fahrenheit. This prevents scalding. Choose faucets that are easy to operate. Lever-operated, push-type, or electronic controls are far better than tiny knobs that require dexterity you might not have.
Grab bars are essential. Install them in the shower and next to the toilet. They need to withstand 250 lbs of force. That means you need reinforced walls behind the drywall. Don’t skip this step.
Toilets can be raised to make sitting and standing easier. But don’t forget the space around them. A wheelchair user needs a clear floor area of 30 by 48 inches to approach and use the sink properly. Measure twice. Cut once.
Kitchen Adjustments
The kitchen needs the same clear floor space as the bathroom. The sink and the range both require 30 by 48 inches of clearance. Wheelchairs need room to roll in and out.
Countertops can be multi-level. Have one section at a standard standing height and another lower, seated-friendly height. This accommodates everyone in the house.
Appliances matter too. Standard refrigerators with top freezers are useless for someone in a wheelchair. A side-by-side model keeps everything at eye level. Ranges with front controls are better for seated cooking, though they pose a risk if small children are around. If vision is an issue, look for ranges with touch controls or high-contrast color schemes. Finally, a raised dishwasher reduces bending. It’s a small change that saves your back.
Preventing Falls
Falls are common. For older adults, they can be devastating. You can reduce the risk.
- Keep bathrooms and stairways bright. Lighting prevents missteps.
- Fix uneven pavement outside. Tripping hazards don’t stop at the door.
- Store supplies in lower cabinets. No need to reach high.
- Use nonslip bath mats. Slippery surfaces are dangerous.
From roll-in showers to step-free entries, the goal is safety. The details matter.
The Hidden Details Behind Accessible Design
The blueprint for a livable home doesn’t end with ramps and grab bars. It lives in the specifics—the materials you touch every day and the layouts that prevent tripping before it happens. You are looking at the granular level of home modification. This is where theory meets the floor.
Flooring and Surface Safety
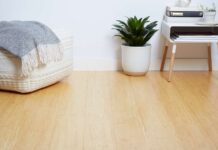
Trip hazards are the enemy. Smooth, hard surfaces are slippery when wet. That is why non-slip flooring is a top priority for aging in place. Vinyl composite tile (VCT) or sheet vinyl are strong candidates. They offer a seamless surface with minimal grout lines. Grout is a trap for dirt and a slipperiness risk. Wood floors work too, but they need matte finishes to reduce glare. High-gloss finishes reflect light in ways that confuse depth perception.
“Smooth transitions between rooms are critical. Thresholds create bumps that can catch a cane wheel or a walker caster.”
Avoid wall-to-wall carpeting in high-traffic zones. It can bunch up. Instead, use low-pile area rugs with non-slip pads underneath. Secure them firmly. Loose rugs are leading causes of falls for older adults. The American Academy of Orthopaedic Surgeons notes that fall prevention starts with the ground beneath your feet. Ensure floors are even. Fix any loose boards immediately.
Bathroom Modifications: More Than Just a Handle
The bathroom is the highest risk area in the house. Water plus gravity equals danger. Installing a fiberglass shower surround or a tub surround system provides a waterproof, easy-clean surface that eliminates mold-prone grout. These units often come with built-in seats and grab bars. That is a time-saver and a cost-saver.
Check the AARP Home Fit Guide for specific dimensions. A walk-in shower should have a zero-threshold entry. No curb to step over. If a tub remains, install a transfer bench. It allows you to slide from a wheelchair into the tub safely. Never rely on the tub’s built-in seat alone. They are often slippery and unstable.
Use lever-style faucet handles. Knobs require grip strength and wrist rotation. Levers work with a closed fist or an elbow. This matters when your hands are full or weak. Anti-scald valves are mandatory. They prevent sudden temperature spikes that can cause shock or burns. GE Appliances and other manufacturers offer universal design faucets that integrate these features without looking clinical.
Kitchen Ergonomics and Storage
Reachability dictates safety. If you have to stretch, you might lose balance. Lower the hanging rod in the closet or install pull-down shelves. Upper cabinets should be avoided for daily use items. Place frequently used pots, pans, and dishes in base cabinets. Use lazy Susans or pull-out drawers to access back corners without leaning.
Countertop height matters. Standard height is 36 inches. Some users may need 34 or 32 inches to work comfortably without straining their back. Check with a Certified Aging-In-Place Specialist (CAPS) for personalized measurements. The National Association of Home Builders certifies these pros. They understand the nuances of ADA Standards for Accessible Design.
Granite countertops are durable but heavy. Ensure the cabinetry can support the load. Formica is a lighter, budget-friendly alternative that is also durable. Both are non-porous and easy to clean. Avoid rough textures that can harbor bacteria or make cleaning difficult.
Lighting and Visibility
Glare is a silent hazard. Poor lighting makes it hard to see edges, steps, or obstacles. Use layered lighting. Ambient light for general visibility. Task lighting for counters and reading. Accent lighting for paths.
Install rocker switches instead of traditional toggle switches. They are easier to flip with a finger pad. Use motion-sensor lights in hallways and closets. They turn on automatically as you approach. This prevents you from fumbling for a switch in the dark.
Consider color contrast. If your walls are white, use a darker color for the doorknobs and light switches. This helps those with low vision locate controls quickly. The Center for Universal Design at North Carolina State University emphasizes that visibility is about contrast, not just brightness.
The Garden and Outdoor Spaces
Accessibility extends outside. Raised garden beds allow you to garden without bending over. Hancheck, Larson, and Vollmar’s work on therapeutic horticulture highlights the physical and mental benefits of accessible gardening. Use wheeled carts for transporting plants. Ensure pathways are wide enough for walkers or wheelchairs—usually 36 inches minimum.
Gravel can be unstable for wheels. Paved paths with non-slip surfaces are better. Install handrails along any steps. Even shallow steps can be treacherous if you are unsteady. The Fair Housing Accessibility First organization notes that common violations often include inadequate outdoor handrails and uneven walkways. Fix these before they cause an accident.
Legal and Professional Considerations
You do not have to navigate this alone. The Americans with Disabilities Act (ADA) sets standards for public accommodations. For private homes, local building codes apply. However, following ADA guidelines often ensures a more functional space. The U.S. Department of Justice provides detailed standards online.
Hiring a professional can be worth it if you lack the skills. A CAPS-certified remodeler knows the latest codes and products. They can identify potential issues you might miss. The Center for Universal Design defines accessible, adaptable, and universal design clearly. Accessible means usable by people with disabilities. Adaptable means it can be modified easily. Universal design means it is usable by everyone, regardless of age or ability.
“Universal design isn’t about creating a hospital. It’s about creating a home that works for you now and ten years from now.”
Check local resources. The Federal Interagency Forum on Aging Related Statistics reports that Americans are living longer and healthier. But disparities remain. Preparing your home now reduces the need for major renovations later. It also maintains independence.
Sources like AARP, the CDC, and various university extensions provide checklists. Use them. Walk through your home with a fall prevention checklist from the CDC. Look for loose rugs. Check handrails. Test door handles. Small adjustments can have a huge impact on safety.
The goal is not just compliance. It is comfort. It is dignity. It is the ability to move through your space without fear. Start with the floor. Then the walls. Then the fixtures. One step at a time. The rest will follow.