


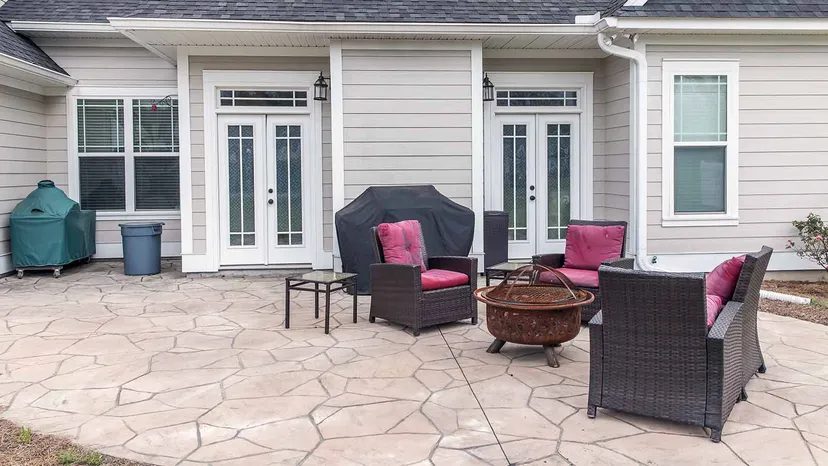
It isn’t exactly a weekend project for the faint of heart. Stamped concrete demands heavy, specialized mats and significant physical effort. You are pressing into wet cement, wrestling with texture, hoping the pattern doesn’t slip. It’s labor-intensive.
But here is the trade-off.
While the labor cost climbs, the material cost drops significantly compared to the real deal. You get the look of natural stone or wood without the premium price tag. The average poured concrete cost stays low. You save thousands.
This isn’t just about aesthetics. It’s about value. When done right, stamped concrete complements existing landscapes. It boosts curb appeal. It can raise your home’s worth. The key is picking the right spots.
Garden Pathways
Your backyard doesn’t have to look like a slab. Use stamping to define your garden paths. Outline your front yard for a sharper entrance.
“You can choose an intricate stamped concrete design that mimics the appearance of fractured earth, real stone and even wood for a durable, low-cost alternative.”
Why does this matter for homeowners? Because cracked earth textures blend into foliage. Stone patterns look intentional, not accidental. Wood grain patterns add warmth to hardscapes. You aren’t just pouring a path; you are creating a visual flow.
The durability is the real selling point. Concrete outlasts wood. It resists rot. It handles foot traffic better than pavers that shift over time. If you are DIYing, start small. A garden path is forgiving. It allows you to learn the rhythm of the stamp before tackling a massive patio.
Pool Decks
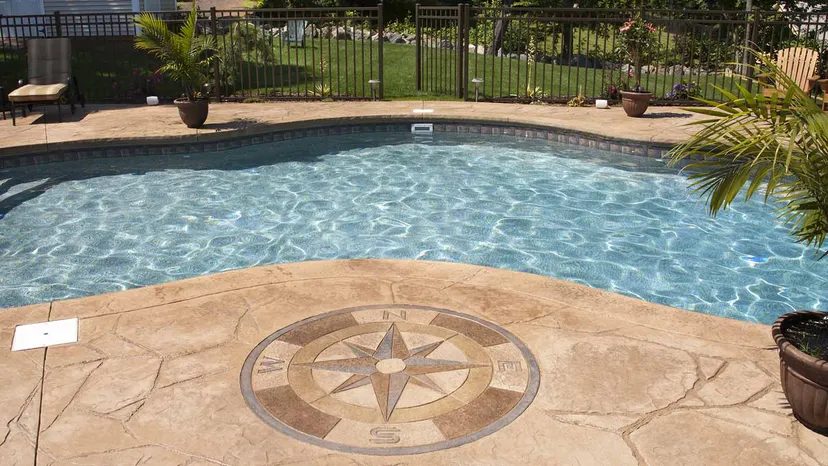
Stamped concrete isn’t just about looks. It’s about structural integrity. When you’re building a base for a hot tub or an above-ground pool, you need something that won’t crack under pressure. This material distributes heavy loads efficiently. It also creates a clean, comfortable walking surface. Guests appreciate that. They don’t want to sink into mud or trip over uneven grass.
However, concrete is porous. Water gets in. It freezes. It expands. It cracks. That’s why sealing is non-negotiable. You need a non-skid additive mixed into the sealant. This does two things. It protects the patio material from water damage. It drastically improves slip-resistance. Safety isn’t an afterthought. It’s part of the build.
Outdoor Entertainment Areas
Where else does concrete shine? In the backyard kitchen. Or around the fire pit. These zones generate heat. Wood decks can warp or catch fire. Concrete resists both. It’s durable. It’s heat-resistant. It reduces fire hazards around your home.
Using a stamped overlay allows for a DIY project. You aren’t pouring a massive slab from scratch. You’re adding a layer. This layer protects your home from combustible cooking devices. It also crafts an eye-catching outdoor entertainment area. Friends gather there. They wait for meals. They stand on something solid.
7 Steps to Build a DIY Stamped Concrete Patio
This process requires precision. Rush it, and the pattern will blur. The finish will be uneven. Here is how you do it.
1. Prep the Site
Start with a clean, level base. Remove all vegetation. Dig out enough soil to accommodate the concrete depth plus a gravel sub-base. Compact the gravel. Use a mechanical compactor if you can rent one. If not, a hand tamper will do. It takes longer. But it works.
2. Lay the Base and Formwork
Install wooden forms to define the shape of your patio. Use pressure-treated lumber. Secure them with stakes driven into the ground. Check for level. Use a string line to ensure straight edges. This is the skeleton of your project. If the frame is crooked, the concrete will be too.
3. Pour and Spread the Concrete
Mix your concrete according to the manufacturer’s instructions. Aim for a consistent slump. Pour it into the forms. Use a straight edge to screed the surface. Move in a sawing motion. Keep the board level. This creates a flat plane. Fill any low spots with more mix.
4. Float the Surface
Once the concrete is placed, use a bull float. This tool smooths out large irregularities. It brings some paste to the surface. Wait for the concrete to stiffen slightly. Then, use a magnesium float. This fine-tunes the texture. It prepares the surface for the stamping. Too wet, and the stamps will sink too deep. Too dry, and the pattern won’t transfer.
5. Apply Release Agent and Stamp
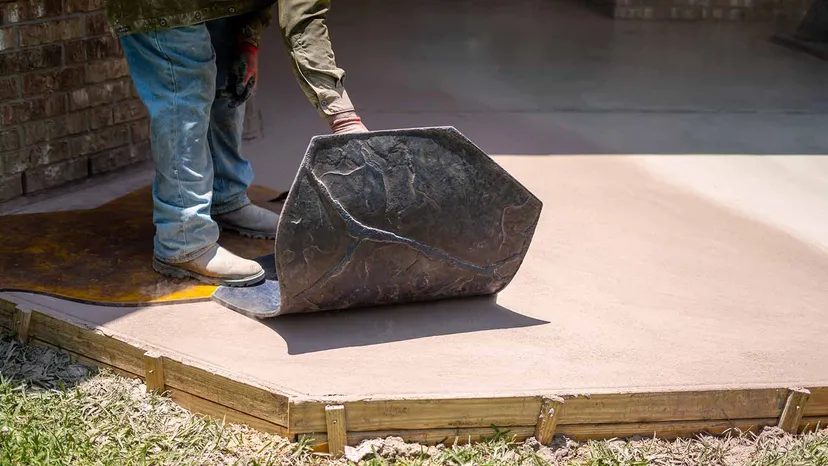
Sprinkle the release agent evenly over the surface. This prevents the stamps from sticking to the concrete. It also adds color variation. If you’re using color hardeners, apply them now and broadcast them by hand. Trowel them in. Then, lay out your stamp mats. Align them
Why a Solid Foundation Matters for Stamped Concrete
You can’t build a lasting patio on shaky ground. The first real work happens before the concrete ever leaves the mixer. You need a subgrade that won’t shift and a subbase that drains well. Clear out old concrete, big rocks, and anything else that will cause uneven settling. Compact that soil tight. If you skip this, your patio will crack. It’s not a matter of if. It’s a matter of when.
Pour your slab at least 4 inches deep. That’s the minimum. Add wire mesh or small rebar grids inside the mix. This reinforcement stops the concrete from splitting under weight. Poor soil conditions lead to structural failure. You’ve seen it on older patios. Don’t let yours become that statistic.
Setting Up Your Patio Shape and Forms
Visualize the layout before you drive any stakes. Use wooden forms around the perimeter to hold the wet concrete in place. Kicker boards and angled stakes keep those forms from bowing out under pressure. String lines and levels are your best friends here. They ensure your lines stay straight and your elevation is correct.
Curved paths need thin, flexible forms. You’ll need more support stakes for curves because the concrete pushes hard against the edges. Double-check all measurements. Calculate the square footage of your design. Multiply that number by the depth of your slab to get the total cubic yards of concrete you need. Getting this wrong means wasted material or running out mid-pour.
Gathering Tools and Materials for the Job
You’ll need floats, trowels, hammers, impact drivers, tape measures, and levels. But the most critical items for stamped concrete are the texture mats. You need enough of them to cover the slab before the surface skins over.
Decide on your mixing method. Renting a concrete mixer works for small batches. Calling a ready-mix truck is better for large areas. If you go the truck route, plan the access. The chute or hose needs a clear path to the pour site. Otherwise, you’re hauling heavy wheelbarrows back and forth until you’re exhausted. Plan the logistics before the concrete arrives.
Choosing and Applying Color Additives
Color changes everything. You have two main options. Integral coloring means adding pigment to the mix before it pours. This gives the color depth throughout the slab. Topical color hardener, or broadcast coloring, is spread on the surface after pouring. It creates a denser, more color-rich surface layer.
Pick a shade that fits your home’s exterior. Mix it thoroughly. Inconsistent color will show up clearly in the final stamped pattern.
Pouring and Finishing the Surface
Pour the concrete evenly up to your elevation marks. Use floats and trowels to move excess concrete into shallow spots. This process is called leveling. Smooth the top surface. Remove air bubbles. Break up lumps. You want a flat, even walking surface. If the surface isn’t smooth now, the stamps will just copy those imperfections.
Applying Concrete Stamps for Texture
Here is where the magic happens. You have to move fast. The concrete must be firm enough to hold an impression but soft enough to be stamped. This window is short.
Apply a color-releasing agent to the back of your texture mats. This acts as a lubricant. It prevents the mats from sticking to the uncured concrete. Once the agent is on, lay out the stamps carefully. Match your intended design. One wrong placement ruins the pattern. If you make a mistake, you have to smooth that area out again before the concrete hardens. There is no undo button.
Curing, Washing, and Sealing Your Patio
Wait at least 24 hours before removing the mats. Rushing this step can damage the texture. After the mats are off, use a pressure washer to rinse away the color-releasing agent residue. The surface should be clean and ready for protection.
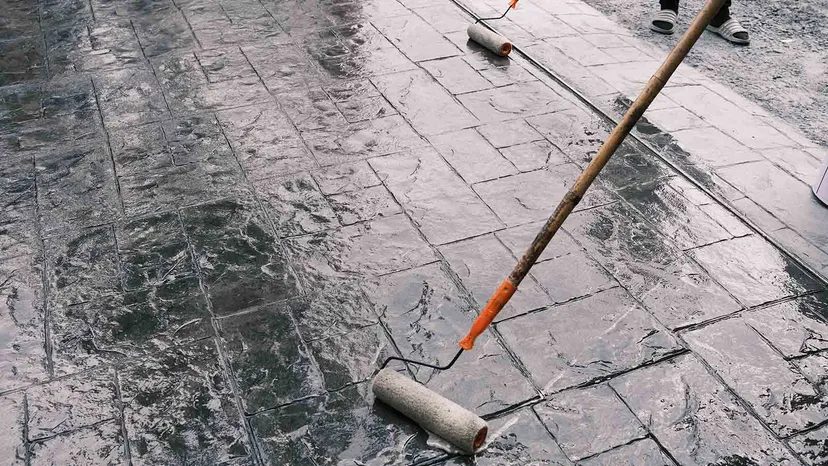
Apply a non-slip sealer. This is non-negotiable for outdoor concrete. The sealer shields the slab from moisture, UV rays, and daily wear. It also makes maintenance easier. You’ll spend less time cleaning the surface throughout the year. The finish holds up better. The color stays vibrant.
This process takes precision. One slip in timing or placement can cost you hours of rework. But the result is a custom patio that looks like stone or brick without the heavy lifting. Just remember to respect the drying times.
The Price Tag of Stamped Concrete
Is a stamp concrete patio cost going to break the bank? Probably.
Average concrete in the U.S. runs $110 to $165 per cubic yard. But stamped work? It sits higher on the pricing ladder. You are paying for the design complexity and the labor involved. A simple square slab? Cheaper. A curved pool deck with elevation changes? Expect to pay more.
Why? More steps. Specialty stamps. Expansion joints.
For those complex shapes, hiring a pro might actually save you money in the long run. Bad concrete doesn’t just look bad. It cracks. It crumbles. Fixing a botched DIY pour costs more than paying an expert upfront.
Breaking Down Your Budget
Stamped concrete is cheap compared to pavers or natural stone. But “cheap” is relative. Your budget will bleed if you don’t watch three specific areas.
1. The Labor Variable
DIY saves cash. But only if you don’t mess it up.
Construction has a sharp learning curve. One bad trowel mark and you are looking at a patch job. Or worse, a full redo.
Contractors charge a premium. But consider your time. Do you want to spend a weekend sweating over a slab? Or do you want to relax? Start small. Try a small walkway. Build your skills. Then tackle the big patio. If the project feels overwhelming, step back. Hire help. It is not a failure. It is a smart financial decision.
2. Materials List
Concrete is sold by the cubic yard. Stamps are priced per square foot. Do not mix these up.
Beyond the concrete itself, you need forms. You need a vapor barrier to stop moisture from rising. You need reinforcement. Rebar or wire mesh. Without it, your slab will crack under its own weight or ground shift.
Count every item. Miss the rebar? You will regret it when the ground freezes.
3. Tool Rentals
You already have a hammer. You probably have a drill.
You do not have a power trowel. You do not have a concrete mixer. You do not have a gravel compactor.
Renting these adds up. A trowel rental might seem small. But combine that with the compactor and the mixer. Suddenly, your tool budget has doubled.
Factor in the cost of the stamps. They are durable, but they are an upfront investment. If you plan to do multiple projects, buying used stamps might make sense. If this is a one-off? Rent or hire.
A Note on Durability
Modern concrete lasts 50 years. Give or take.
Ancient Roman structures? Thousands of years.
Researchers thought it was lost wisdom. Skilled craftsman. Then MIT and Harvard found the real reason. The Romans used quicklime. Not slaked lime.
Quicklime reacts with moisture in tiny cracks. It self-heals. The structure repairs itself.
We do not use quicklime today. We use slaked lime. Our concrete does not self-heal. It waits for the next freeze-thaw cycle.
So when you pour your patio, you are betting on maintenance. Sealing it properly. Leveling the ground correctly.
The materials are there. The tools are available. The knowledge is public.
But the result? That depends on your hands. And your patience.
If you rush it, you get concrete.
If you respect it, you get a patio.
For now.